Filing an Income Tax Return (ITR) is one of the most important annual financial tasks for every taxpayer; even if your income falls below the taxable limit, filing an ITR assists you in applying for loans, visas, and credit cards, as well as claiming tax refunds.
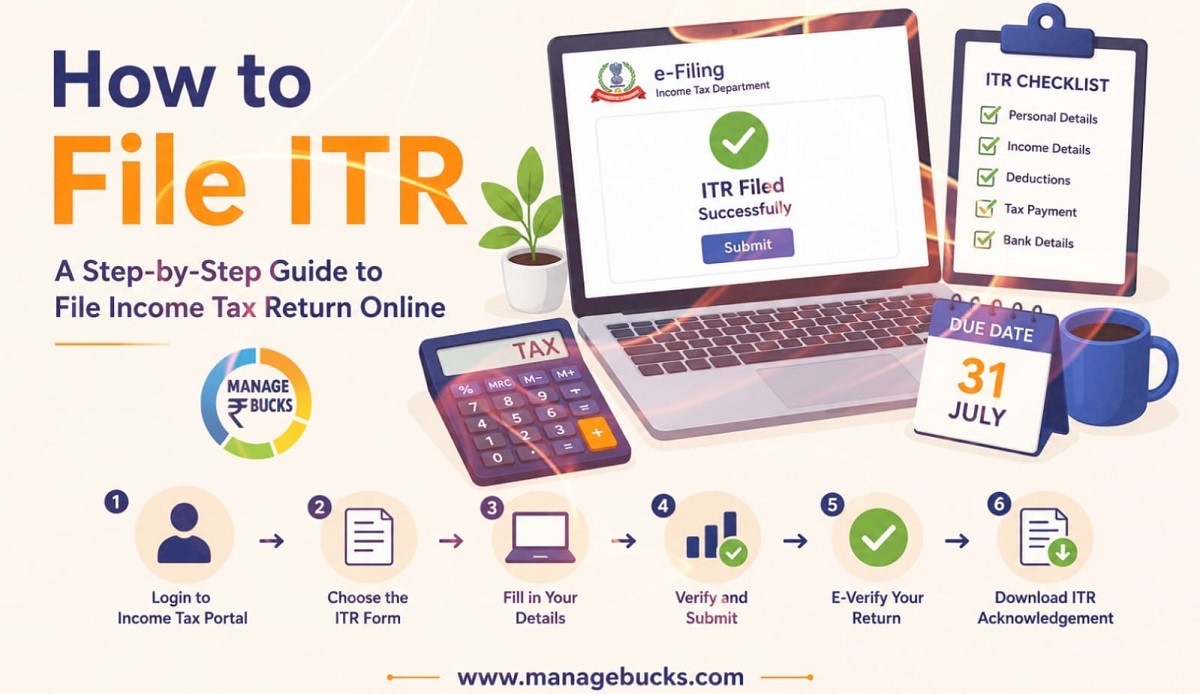
In this guide, we will walk you through the step-by-step process of How to File ITR. You do not need a CA degree for this, nor is there any need to panic; you can easily file it online yourself.
What is ITR?
ITR stands for Income Tax Return; it is a form used to inform the Indian Income Tax Department about the income you earned during a financial year, as well as your deductions, taxes paid, and tax liabilities.
If you have paid excess tax (e.g., through TDS on your salary), you receive a refund. If you have paid too little, you are required to pay the difference.
Who Should File ITR?
You should file an ITR if:
- Your gross total income exceeds the basic exemption limit.
- TDS has been deducted and you want a refund.
- You want to carry forward capital losses.
- You have foreign income or foreign assets.
- You need proof of income for loans or visa applications.
- Your bank deposits, foreign travel expenses, or electricity consumption exceed prescribed limits.
Documents Required Before Filing ITR
Keep the following documents ready:
- PAN Card
- Aadhaar Card
- Form 16 (for salaried employees)
- Salary slips
- Bank account details
- Interest certificates from banks
- Form 26AS
- Annual Information Statement (AIS)
- Taxpayer Information Summary (TIS)
- Investment proof (Section 80C, 80D, etc.)
- Home loan statement (if applicable)
Step-by-Step ITR Filling Process
Step 1: Visit the Income Tax e-Filing Portal
Go to the Income Tax Department’s e-filing portal www.incometax.gov.in and log in using your PAN number, password, and captcha code.
If you are a new user, complete the registration process first
Step 2: Select “File Income Tax Return”
After logging in:
- Click on e-File
- Select Income Tax Returns
- Click File Income Tax Return
Step 3: Choose Assessment Year
Select the appropriate Assessment Year (AY).
For income earned during Financial Year 2025-26, choose Assessment Year 2026-27.
Step 4: Select Filing Mode
Choose ‘Online’ under ‘Mode of Filing’ and then Click ‘Proceed’ to Continue
Step 5: Select Your Status
- Individual (for most salaried people)
- HUF (Hindu Undivided Family)
- Firm/LLP (for businesses)
Step 6: Select the Correct ITR Form
Choose the form applicable to your income source.
ITR-1 (Sahaj)
Suitable for:
- Salaried individuals
- Pensioners
- One house property
- Income up to ₹50 lakh
ITR-2
Suitable for:
- Capital gains income
- Multiple house properties
- Foreign assets or income
ITR-3
Suitable for:
- Business or professional income
ITR-4 (Sugam)
Suitable for:
- Presumptive taxation scheme taxpayers
Select the correct form and proceed.
Step 7: Verify Personal Information
Check:
- Name
- PAN
- Aadhaar Number
- Mobile Number
- Email ID
- Address
- Bank Account Details
Update any incorrect information.
Step 8: Verify the Pre-Filled Info
Don’t just trust the auto-fill blindly. Check:
- Is your salary figure correct?
- Does the TDS match your Form 16 and 26AS?
- Are your deductions (80C, 80D, etc.) showing up?
Add anything that’s missing.
Verify all income sources including:
- Salary income
- Interest income
- Rental income
- Capital gains
- Other income
Correct any missing or incorrect entries.
Step 9: Claim Deductions
Enter eligible deductions under sections such as:
- Section 80C (PPF, ELSS, LIC, EPF, etc.)
- Section 80D (Health Insurance)
- Section 80G (Donations)
- Section 80CCD(1B) (NPS)
Review all deductions carefully.
Step 10: Check Tax Liability
The portal automatically calculates:
- Total Income
- Tax Liability
- TDS Credit
- Tax Refund (if any)
- Additional Tax Payable (if any)
If additional tax is payable, make the payment and update the challan details.
Step 11: Preview and Submit Return
Click Preview Return.
Carefully verify:
- Income details
- Deductions
- Bank account information
- Tax calculations
If everything is correct, click Submit.
Step 12: e-Verify Your ITR
Your return is considered complete only after verification.
You can e-verify using:
- Aadhaar OTP
- Net Banking
- Bank Account EVC
- Demat Account EVC
- Digital Signature Certificate (DSC)
Aadhaar OTP is the easiest option for most taxpayers.
Step 13: Download Acknowledgement
After successful verification:
- Download ITR-V acknowledgement.
- Save a copy for future reference.
Common Mistakes to Avoid
- Selecting the wrong ITR form.
- Not reporting all income.
- Ignoring AIS and Form 26AS mismatches.
- Entering incorrect bank details.
- Forgetting to e-verify the return.
- Claiming deductions without supporting documents.
Benefits of Filing ITR
- Easier loan approval.
- Faster visa processing.
- Claim income tax refunds.
- Carry forward losses.
- Proof of income.
- Better financial credibility.